¶ Evolution Anywhere Database Upload and Deploy documentation.
Prerequisite
- You are Registered as a reseller: Register
- You have a configured a Evolution Anywhere Server: Server-connection
¶ Introduction
Database Upload and Deploy is used to facilitate the transfer, backup and deployment of your SQL database. This feature will allow you to directly upload a database from a SQL Server instance or from a pre-existing backup file (.bak) to a centralized EA-Server. Or another location managed by Evolution Anywhere SA(Pty) Ltd. This is Useful for centralizing your data ensuring that you have access to the latest version of your database across multiple locations.
Database Upload and Deploy feature
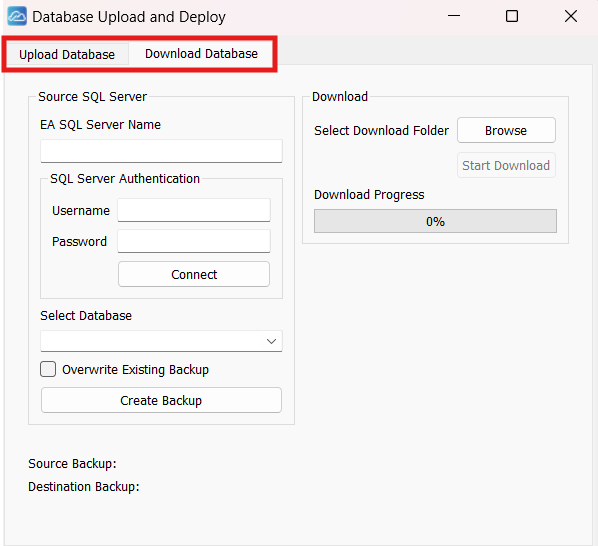
When you open the Database Upload and Deploy, you are presented with two functions.
-
Upload Database: This window allows you to either connect directly to a source SQL Server to upload a database or manually select a backup file (.bak) for upload. You can enter the SQL Server name, authenticate with your credentials, and choose the database you wish to upload.
-
Download Database: This function (not shown in the image but typically present) would allow you to download databases from a remote server to your local environment. The interface usually mirrors the upload process, offering similar options for selecting the destination and authentication.

¶ Upload Database
- Source SQL Server
- In the SQL Server name field, enter the name of your Evolution Anywhere SQL Server instance you want to upload to. This could be a local server or a remote server that you have access to.
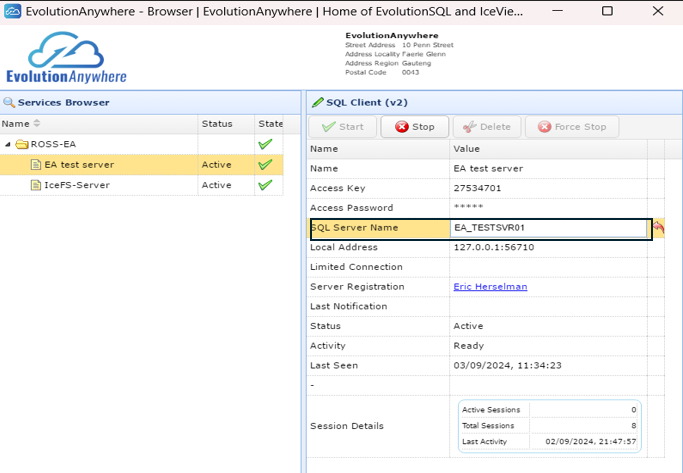
- You can source a Evolution Anywhere server you’re looking for from the Evolution Anywhere-Browser application.
Copy the SQL server name from the EA browser application.

- Paste the SQL Server name into the “EA SQL Server Name” on Database Upload.
- SQL Server Authentication
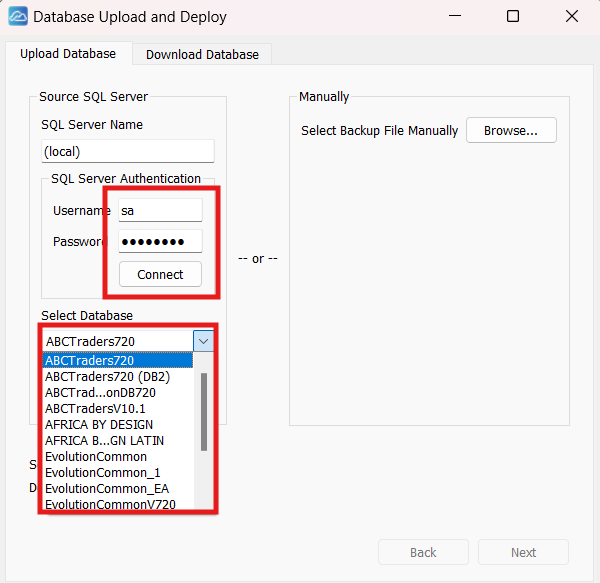
- Enter your EA Username and password.
- It's important to note that the account you are logging into has access to the SQL server you want to upload to.
- Click Connect to establish a connection to the SQL Server.
- Once you’ve successfully established a connection you will be able to see your databases in the dropdown menu “Select Database”

- Select the Database
- After connecting to the SQL Server, you’ll see a dropdown list under Select Database, choose the database you want to upload to from that dropdown list.
- If you are uploading a updated “version” of a database that already exists on the server you are connected to, check the Overwrite Existing Backup option(Visable when drop down menu is minimized) then click Create Backup.
¶ Download Database
- Enter the Source SQL Server Details:
- Enter the name of the SQL Server from which you want to download the database.
- SQL Server Authentication:
- Provide the Username and Password to authenticate the connection to the SQL Server.
- Click Connect to establish a connection with the SQL Server.
- Choose Download Location:
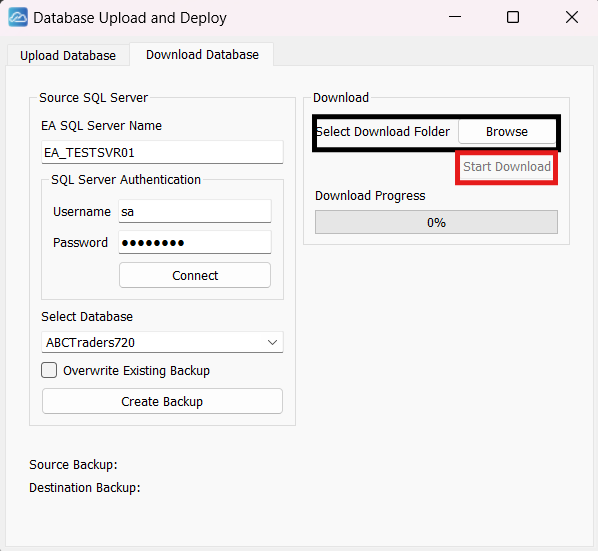
- On the right-side database upload and deploy. You are able to select a download Folder. Click Browse and chose or create a folder on your machine you want the database to download to.

- Initiate the Download:
- After selecting the download folder, click Start Download to begin the download process.
- After selecting the download folder, click Start Download to begin the download process.
- Once the download is complete there will be a “Download complete” message at the bottom of the application with the File path to the download.
Verify the download by navigating to the folder you selected on your local machine.
If you have followed along this far congrats you can finally start with sage intergration the next step from here is starting a File-Share dont worry it's easy